Find two trees 2 to 3 meters (7 to 10 feet) apart on a good shelter spot, with the open side away from the wind. Check which way the wind is coming from before you choose your trees. Watch leaves, grass or smoke. The back of the lean-to goes into the wind, so the open side faces away. A second manual says the entrance should face 45 to 90 degrees away from the usual wind.
Shelter · Shelter course
Lean-to: with a tarp, or with what the woods gives
A lean-to is a sloped roof on a frame. With a tarp it takes minutes. Without one, you build the roof from polespoles Dead, straight sticks about as thick as your wrist and 2 to 3 meters long. Dead standing wood is best: dry, and it snaps clean., bark slabsbark slabs Big sheets of bark peeled off a dead log. Laid like shingles, bottom row first, they shed rain. and boughsboughs Leafy evergreen branches (hemlock, pine, spruce, fir). Layered on a roof they shed rain; piled inside they make a dry bed.. Both are below.
Why this matters
A lean-to is a slanted roof with one open side. It keeps rain and wind off your back and lets a fire in front warm you. With a tarp or poncho it goes up in a short time. Without one, the manual says you can still build it from poles, saplingssapling A young, thin tree, usually thinner than your wrist. Springy and easy to bend., vines and leavesdebris Dry leaves, pine needles, grass and ferns. Piled deep they trap still air, which is what keeps you warm. with no tools or only a knife. It takes longer, but it protects you from the weather.
The open side is both its strength and its weakness. Face it the wrong way and the wind blows straight in. Skip the bed and the ground drains your heat no matter how good the roof is. In snow country the manual says pile snow around the sides for insulationinsulation Anything that traps still air and slows heat from leaving: dry leaves, pine needles, snow, wool, a puffy jacket..
What you need
- With a tarp: a tarp or poncho, about 2 to 3 meters (7 to 10 feet) of cord, sharpened sticks about 30 centimeters (1 foot) long for stakes, and two trees.
- With no tarp and no cord: two trees or forked sticks, one pole about 2 meters (about 6.5 feet) long and about 2.5 centimeters (1 inch) thick for the top, five to eight poles about 3 meters (10 feet) long for the roof beams, vines or saplings, and plenty of brush, leaves, pine needles or grass. No tools are needed.
The manual says the tarp or poncho lean-to takes only a short time, and the all-natural one takes longer. It gives no exact times.
Step by step
With a tarp: tie your cord between the trees about waist high and hang one long edge of the tarp over it. The cord between the trees is the ridge lineridgeline The long top edge of a hill or a chain of hills, like a spine, with land dropping away on both sides., the top edge of the roof. The manual ties it with a round turn and two half hitchestwo half hitches A simple way to tie a rope to a post or tree: two wraps of the free end around the rope itself. with a quick-release knot. It also ties a small "drip stick" about 10 centimeters (4 inches) long to each rope, about 2.5 centimeters (1 inch) from the tarp, so rain running along the rope drips off there instead of running into your shelter.
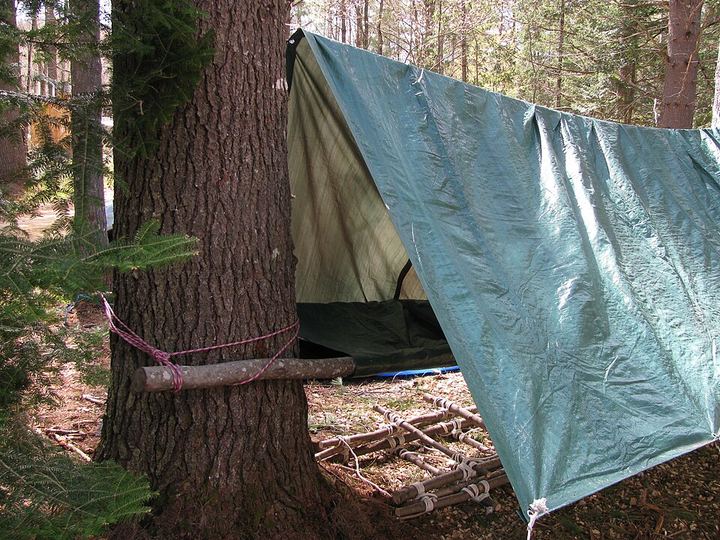
Cord tied between two trees holds the tarp edge With a tarp: stake the other edge to the ground with sharpened sticks about 30 centimeters (a foot) long. Pile brush or your pack on the open sides. Staking the low edge tight makes the roof shed rain instead of flapping. Brush or your pack on the open ends blocks side wind. If you will stay more than one night or rain is coming, the manual adds a center support: a line from the middle of the tarp up to a branch overhead, with no slack.
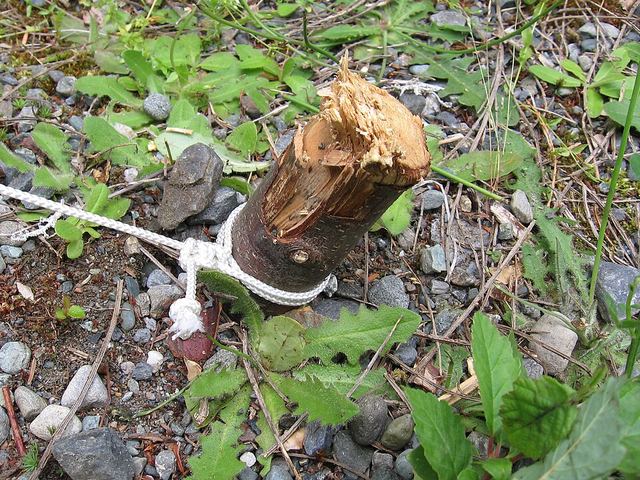
A sharpened stick makes a stake for the tarp edge Without a tarp: lash or wedge a ridge poleridge pole The one long, strong pole that the whole shelter hangs from. About as long as you are tall plus an arm, and at least wrist thick. between the two trees at waist height. Vines, a forked branch or a rock-and-notch hold it with no cord. The ridge pole is the crossbar the whole roof leans on. The manual sets it at waist to chest height. If you have no cord and no handy tree, make two supports from Y-shaped (forked) sticks, or two small tripods, and rest the pole in the forks. Lean on it; it should not move.
Without a tarp: lean five to eight poles against the ridge pole on the wind side, close together, so leaves and bark cannot fall through. These are the roof beams. Lay one end of each on the ridge pole and the other on the ground on the wind side. Then weave saplings or vines across them in a crisscross so the covering has something to sit on and cannot fall through.
Without a tarp: cover the poles with bark slabs or boughs, bottom row first, each row overlapping the one below like shingles. Shingling means each higher row hangs over the row below it, the way shingles on a house or the branches on a living evergreen do. Rain then runs down the outside from row to row instead of running under. Start at the bottom and work up. From inside, any spot where you can see daylight is a spot where rain will come in.
Either way: lay a thick bed of leaves, grass or boughs inside. The ground pulls heat out of you faster than the air does. The manual says that at rest you lose as much as 80 percent of your body heat to the ground. A roof without a bed is half a shelter. Lay straw, leaves, pine needles or grass inside, thick enough that it stays thick when you lie on it.
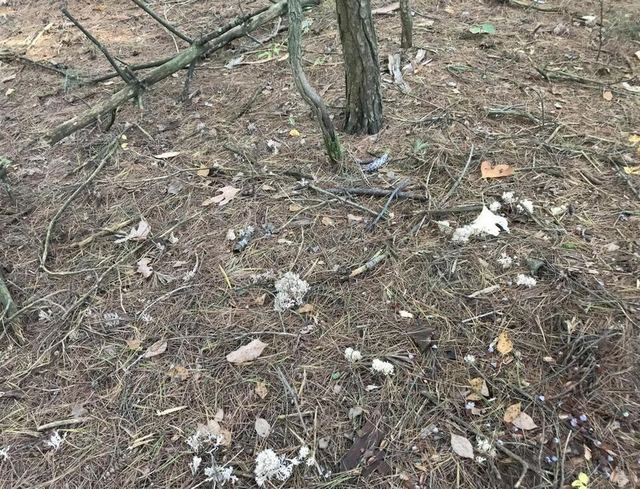
Pine needles make a dry bed under the tarp Build a small fire in front of the open side if it is legal and safe. A reflector wallreflector A low wall of logs or rocks on the far side of a fire that bounces its heat back toward you. of green logsgreen wood Wood cut from a living tree, still full of sap. It will not burn easily, which is why it makes the base under a fire on snow and the reflector wall behind one. behind it bounces heat into the lean-to. A fire in front warms the open side, and a reflector wall of green (freshly cut, living) logs behind the fire bounces the heat back toward you. The cold weather manual warns to keep the fire from burning too hot, which can burn the shelter down or set the roof alight with sparks. The fire reflector lesson covers how to build the wall.
Tips from survival instructors
- Face the open side away from the wind. If you can, put a fire in front with a wall of logs behind it to throw heat back in.
- Lay the roof like shingles on a house: start at the bottom and overlap each layer over the one below so rain runs off.
Common mistakes
- Open side facing the wind. The fix: check the wind first, then put the back of the lean-to into it.
- Shingling from the top down. The fix: start at the bottom row and overlap each higher row over the one below.
- Rain running down the rope into the shelter. The fix: tie a drip stick on each rope close to the tarp.
- Sleeping on bare ground under a good roof. The fix: lay a thick bed of leaves, grass or pine needles inside.
- A sagging tarp that collects water. The fix: pull it tight and, for rain or a second night, add a center support line to a branch overhead.
- A fire too big or too close. The fix: keep it small, watch for sparks on the roof, and never leave it burning untended.
Practice it safely
Set up a tarp lean-to in your yard between two trees or two posts. Practice the round turn and two half hitches, and add drip sticks. Then spray it with a garden hose or wait for rain and see where water gets in. Take it down and pack it so you can do it faster next time.
For the all-natural version, use dead, fallen poles and leaves on your own land or where the owner says yes. Many parks do not allow cutting live wood or building shelters, so check the rules. When you are done, take it apart and scatter the material so the spot looks untouched. Only build a fire where fires are allowed, with water nearby, and put it out cold.
Quick check
No tarp and no cord. What holds the ridge pole up?
- Nothing, you need cord
- A forked branch, vines or a notch against the trunk
- Duct tape
Show the answer
A forked branch, vines or a notch against the trunk
Take the quiz and earn the badge
The app checks your answers, keeps your place in the Shelter, and works with no signal once saved.
Before you rely on thisA learning tool, not a replacement for training. In an emergency, call 911.
Sources
- US Army Survival Manual, pages 50 to 51 (poncho lean-to) and 58 to 59 (field-expedient lean-to)
- US Army Survival Manual, pages 50 to 51 (poncho lean-to: rope, stakes, drip sticks, knots, center support, brush on the sides, bedding, 80 percent heat loss)
- US Army Survival Manual, pages 58 to 59 (field-expedient lean-to: poles, Y-shaped sticks or tripods, beams, crisscrossed saplings, shingling bottom up, bedding)
- US Army Survival Manual, page 199 (lean-to in snow: pile snow around the sides)
- Military Survival and Rescue Guide, page 63 (entrance 45 to 90 degrees from the wind, layers overlapping from the bottom)
- Army Cold-Weather Survival Handbook, pages 60 to 61 (boughs laid like shingles on a live tree, forked poles or A-frames, fire reflector, keep the fire from burning down the shelter)
- Army Cold Weather Manual, chapter 3 pages 10 to 11 (lean-to, open fire precautions)