← Outdoor Survivalist Trainer Your area

Shelter · Shelter course

Build a debris hut

Why this matters

The manual calls the debris hutdebris hut A small shelter of sticks with a thick pile of leaves on top and inside. Your body heat warms the tiny space. one of the best shelters for warmth and ease of building, and says that when shelter is essential to survival, build this one. It is a small, wedge-shaped frame of sticks buried under a thick pile of leavesdebris Dry leaves, pine needles, grass and ferns. Piled deep they trap still air, which is what keeps you warm.. The pile traps air, and trapped air keeps your body heat in, the same way a puffy jacket does.

It needs no tarp, no cord and no tools, only a long poleridge pole The one long, strong pole that the whole shelter hangs from. About as long as you are tall plus an arm, and at least wrist thick., sticks, and a lot of dry leaves, grass or pine needles. Its weak spots are a thin pile and a thin bed. Most cold nights in a debris hut come from not enough leaves, not from a bad frame.

What you need

  • Nothing but your hands. No tools or cord are needed.
  • One long, sturdy polepoles Dead, straight sticks about as thick as your wrist and 2 to 3 meters long. Dead standing wood is best: dry, and it snaps clean. for the ridgepole, a stump, rock or tree to rest one end on, many sticks for the sides, and a large pile of dry leaves, grass or pine needles. Gloves help when you gather.

Step by step

  1. Prop one end of a long pole on a stump or tree, about waist high. The ridgepole is the backbone of the hut. Resting one end about waist high on something solid, and the other end on the ground, makes a slope. The manual also allows a tripod of two short stakes holding one end. Push down on the high end; it should not shift.
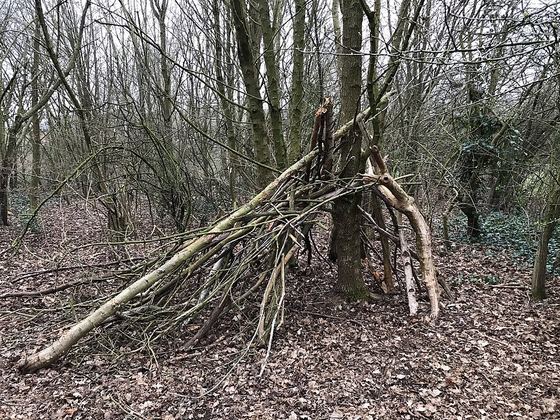
    A long pole propped in the fork of a tree, with sticks leaned against it
    Long pole propped on a tree: the backbone of the hut
  2. Lean sticks along both sides to make a steep wedge, just wide enough for your body. These side sticks are the ribs. The manual says make the ribbing wide enough for your body and steep enough to shed moisture, so rain runs off instead of soaking in. Before you add anything else, crawl in and lie down to check that you fit with a little room to spare.

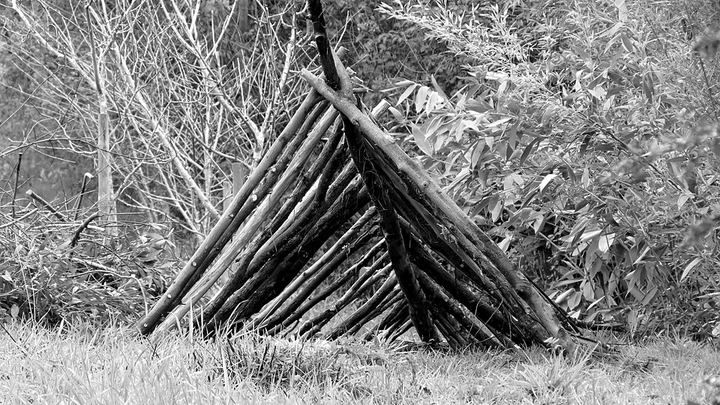
    Sticks leaned on both sides of a ridgepole, making a steep wedge-shaped frame
    Sticks leaned both sides make a steep, narrow wedge
  3. Lay small sticks and brush across them so leaves cannot fall through. The small sticks and brush make a latticelattice A crisscross net of sticks that holds leaves or other covering up, the way a roof frame holds shingles. that holds the leaves up. Without it, the leaves fall through the ribs onto you, and the roof gets thin.

  4. Pile dry leaves on top at least 1 meter (about 3 feet) deep. Thicker is warmer. The pile is your insulationinsulation Anything that traps still air and slows heat from leaving: dry leaves, pine needles, snow, wool, a puffy jacket.. The manual asks for at least 1 meter (about 3 feet) of light, dry, soft material if possible, and says the thicker the better. A stick with a mark at about 3 feet helps you check the depth. Finish with branches or a shingle layer on top so wind does not blow the leaves away.

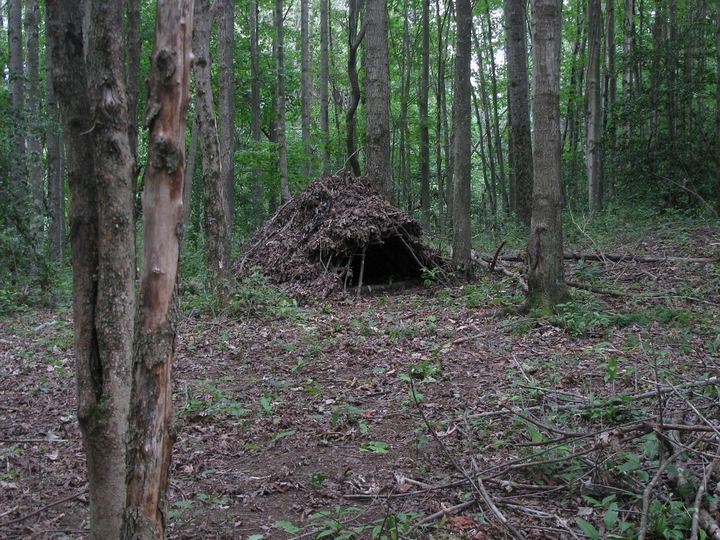
    A finished debris hut: a low mound of sticks and leaves among trees
    Finished hut: a thick mound with a small door
  5. Put about 30 centimeters (a foot) of leaves inside to lie on. The ground pulls heat out of you. At rest you lose as much as 80 percent of your body heat to the ground, according to the manual. The 30 centimeter (1 foot) layer of leaves inside is your mattress and your insulation. Pack it down and add more until it is still thick when you lie on it.

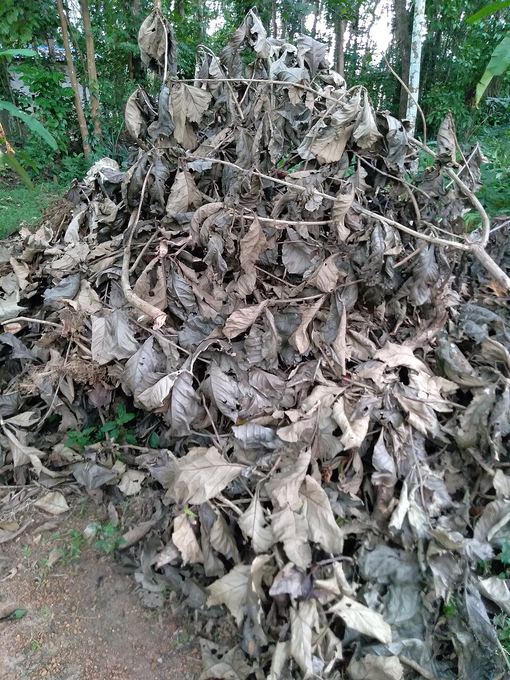
    A deep pile of dry brown leaves
    Dry leaves: pile them deep, inside and on top
  6. Pile leaves by the door to pull in after you. An open doorway lets warm air out and cold air in. Once you crawl inside, drag the pile of leaves into the opening, or build a door. When the hut is right, you should feel your own warmth building up after a little while inside.

Tips from survival instructors

  • Make it just big enough to lie in. Every bit of extra space is air your body has to heat.
  • The bedding under you matters as much as the roof. Pile it thick, because it squashes flat when you lie on it.
  • Before dark, gather twice the leaves you think you need. Plug the doorway behind you with a pack or a pile of leaves.

Common mistakes

  • Making it roomy. The fix: keep the hut barely wider than your body. A small space is a warm space.
  • Too few leaves on top. The fix: keep piling until it is at least 3 feet (1 meter) deep; the manual says thicker is better.
  • Ribs too flat. The fix: set them steep so rain runs off.
  • Skipping the lattice. The fix: lay fine sticks and brush across the ribs so the leaves stay up.
  • No bed inside. The fix: lay a foot (30 centimeters) of leaves inside before you lie down; the ground takes the most heat.
  • Leaves blowing away in a storm. The fix: lay branches or shingling material on top of the leaf pile.

Practice it safely

The best place to practice is your own yard in the fall, using the leaves you rake up and fallen sticks. Build a small hut, crawl in, and notice how much warmer it is with a thick bed than without one. Take it apart afterward and rake the leaves back.

In a park or forest, check the rules first. Many parks do not allow cutting live branches or building structures. Use only dead, fallen wood, keep it small, and take it apart and scatter the material when you are done so the place looks untouched.

Quick check

Why do you put a thick layer of leaves inside, under you?

  • It is softer
  • The ground pulls heat out of your body
  • It keeps bugs away
Show the answer

The ground pulls heat out of your body

Take the quiz and earn the badge

The app checks your answers, keeps your place in the Shelter, and works with no signal once saved.

Before you rely on thisA learning tool, not a replacement for training. In an emergency, call 911.

Sources

Photo credits
Photo: David Lally, CC BY-SA 2.0, sourcePhoto: Walterpeitz, CC BY-SA 4.0, sourcePhoto: JustTooLazy, CC BY 2.0, sourcePhoto: Path slopu, CC BY-SA 4.0, source

More on shelter